
YouTube Video
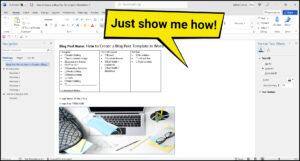
Just Show Me How
How can I resize a bunch of photos to the same size at one time?
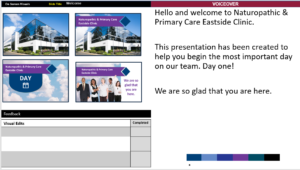
This is one of the tricks I have used for years to resize a large group of photos at one time. Create a new document the size you need. Mine is usually 1920×1080 unless I am using Storyline, then I save all my photos at 1800×900 to leave a block of white space at the bottom of each slide to allow clear space for the close captions to run.
When the canvas is ready, add all the photos you want to resize. Drop each one to the canvas and then adjust it to fit by using the resizing handles. Hold down the shift key to keep the aspect ratio correct. If you name each layer the images will retain that name when you export them.
- When all the sizes are adjusted correctly highlight every layer.
- Then right-click on the layers and select either Quick Export as PNG or Export As, if you want to choose a different format, such as jpg.
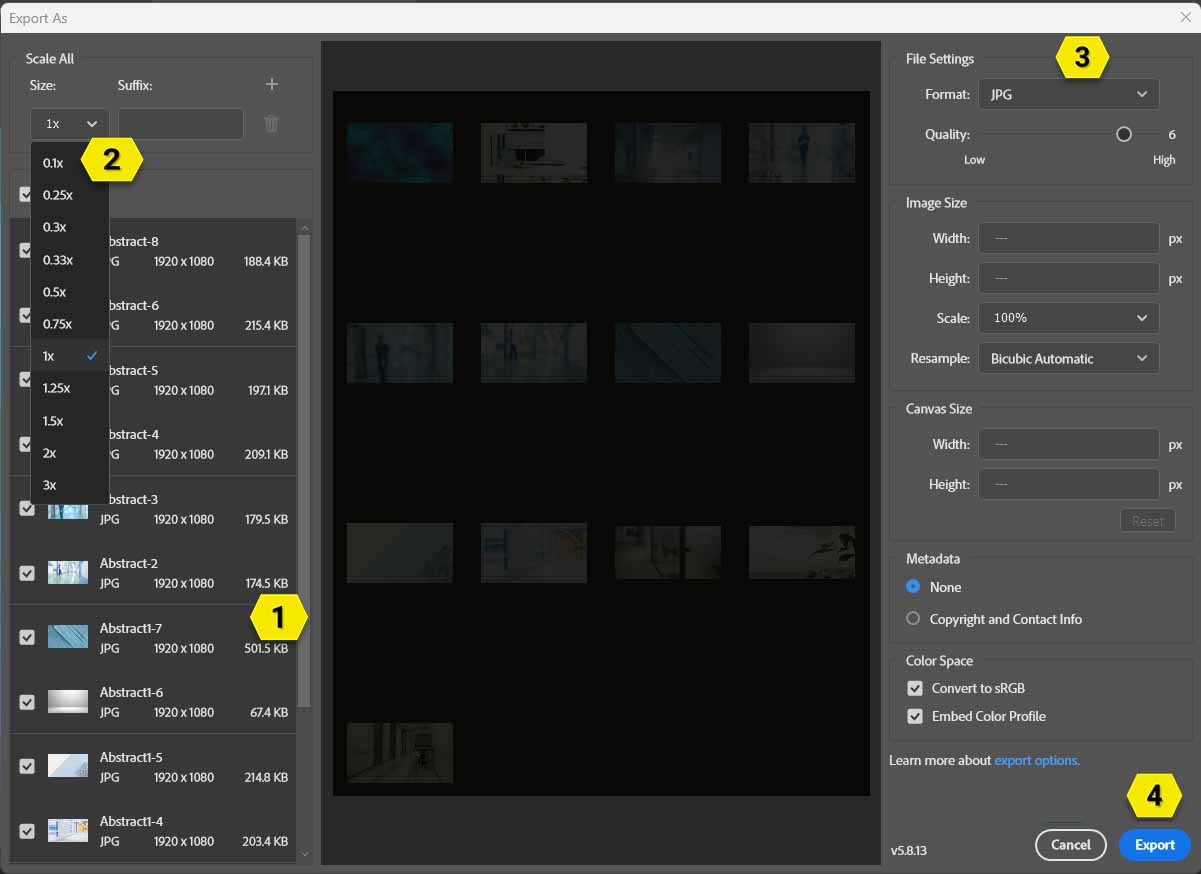
- Select all the individual files on the left side of the Export As box.
Note that just checking the Select All box will not work. Highlight the first image then hold the Shift key and select the last image. This will highlight everything. Make sure they are all highlighted before you select the Format as JPG.
- Make sure the Scale Size is set to 1x.
- Select the format of JPG from the drop-down menu.
- Select Export.
- Select the folder for the files to be save to.
- Notice the file names and the dimensions of each file.


What do all the buttons do in Photoshop?
You don’t have to know what every button does before you begin using Photoshop. That is why I didn’t put this section at the beginning. Every training I have taken to learn Photoshop, starts with an hour or two on all the tools and menus, and what they do. While that is helpful it is also very discouraging too. There are so many things you can do with Photoshop that just opening the tool can become overwhelming to the newbie.
There are a few very basic tools, that I will explain below, that you will need to know about to get started. Focus on the foundational tools to master those, then learn what the others do, one at a time. The more you work with a tool the more comfortable you get with it.
I am sure there are fancier (lawyer-sounding) names for all these things but this is what I have been calling them for 15 years and I am not likely to change that now. The list below is more for reference than you for you to try to memorize it. If you forget what something does or what button does this, stop and Google it. Then keep working. 😊
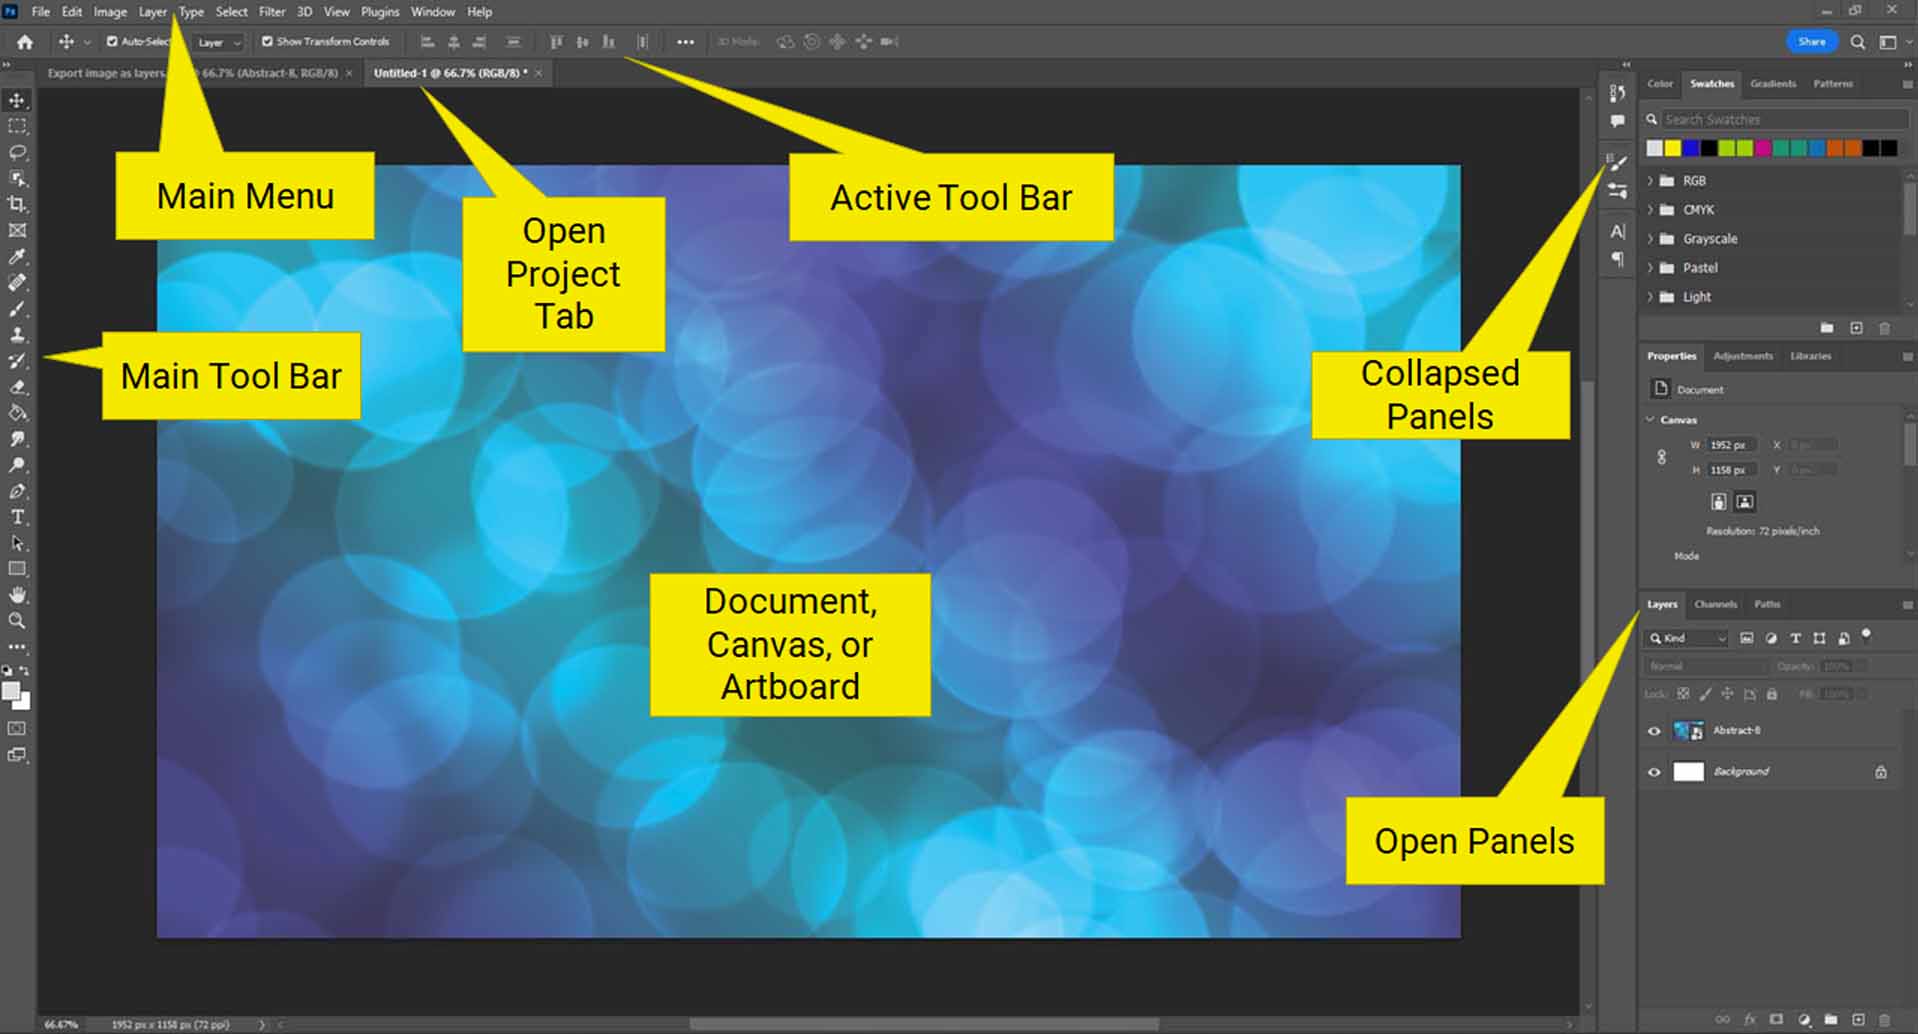
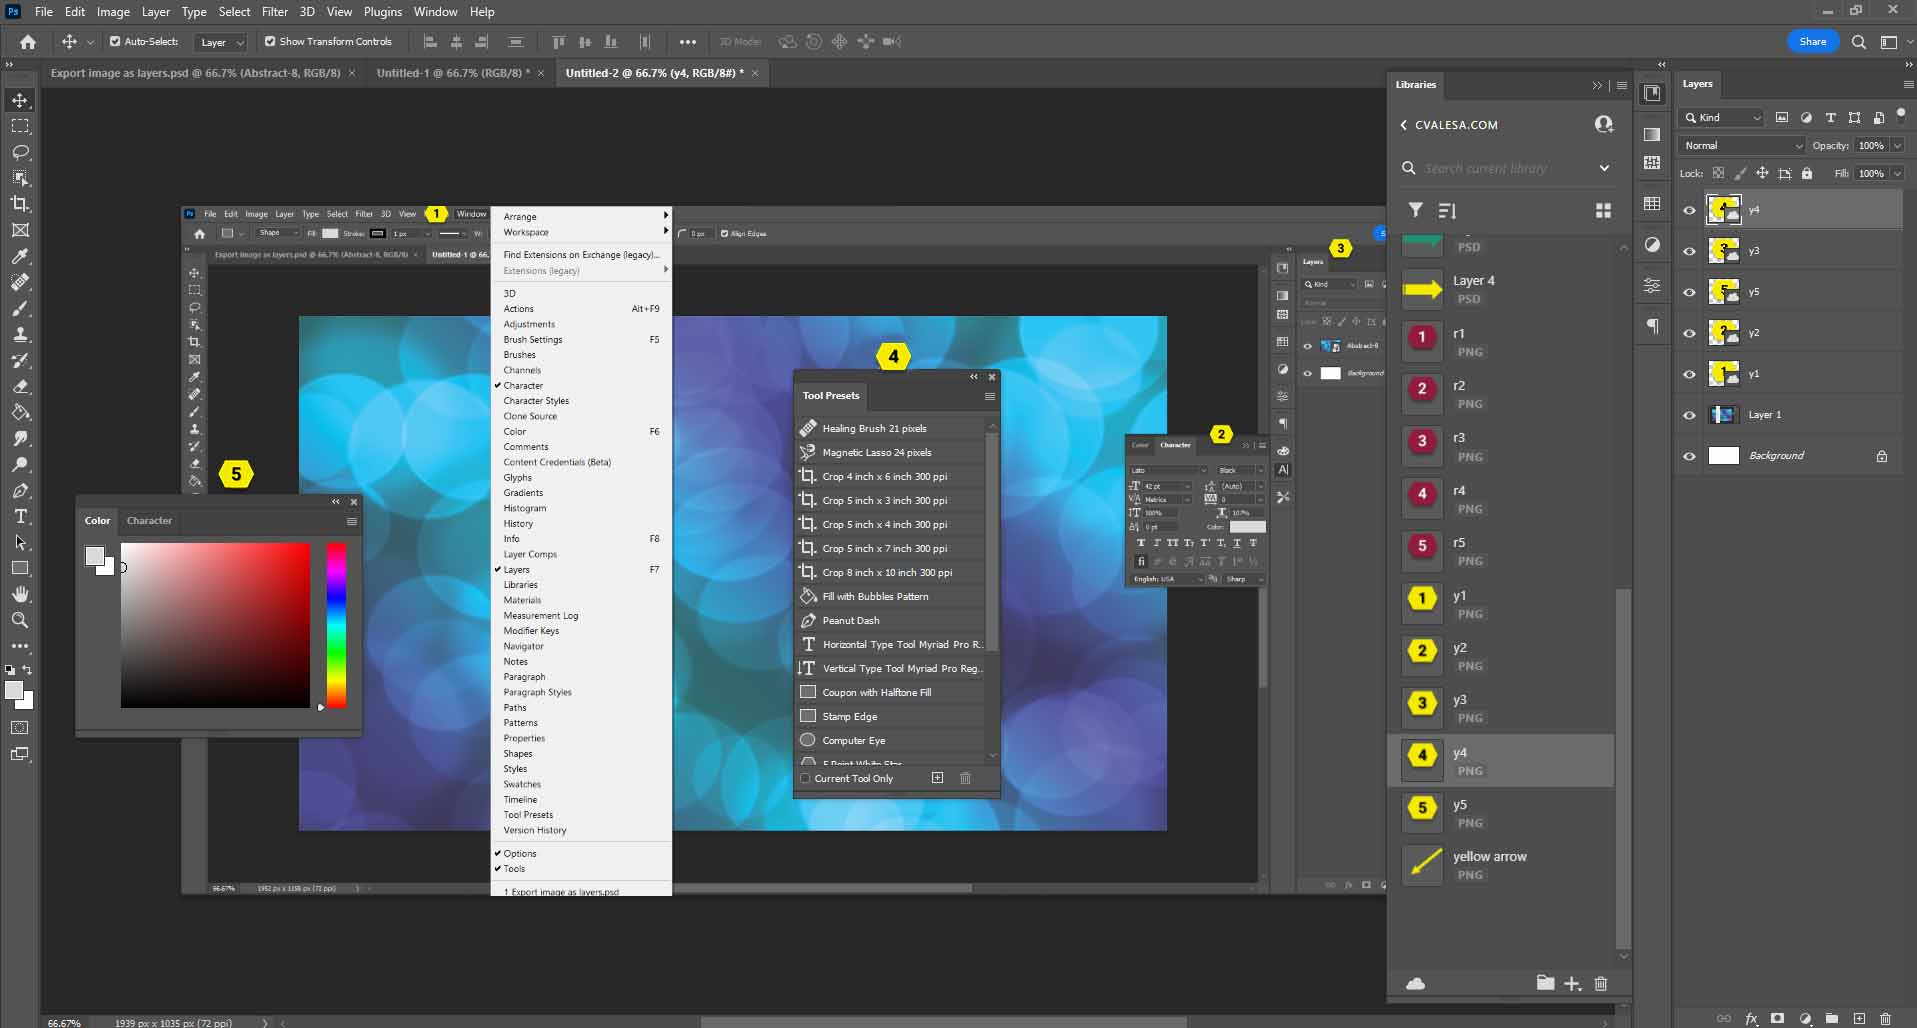
- Main Menu – located at the very top of the screen. Just like other apps, it has File, Edit, Image, Layer, and so forth. Click one of these to open the menu to read the options. Most of these options are available in a tool or panel on the screen, but some are only available from the menu.
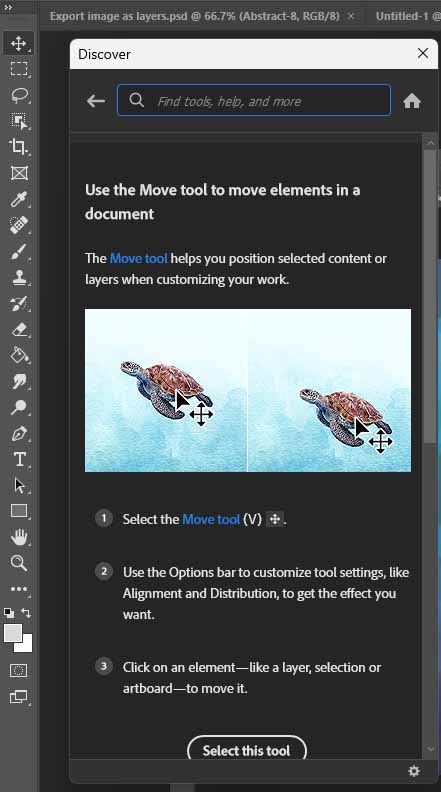
- Main Tool Bar – these are the tools used to create or edit your images. Some of the tools are grouped together. To access a different tool in the group, click and hold the left mouse key or right-click to see the list. Hovering over the tool will open a popup window to explain what the tool is for and to offer more information. Clicking the Learn More button opens the Discover window, as shown here in the image. The Move Tool is at the very top of the list. This is the tool to begin everything. Learn the shortcut of hitting the “V” key to activate it. Anytime you open something you get out of hit the “V” key.
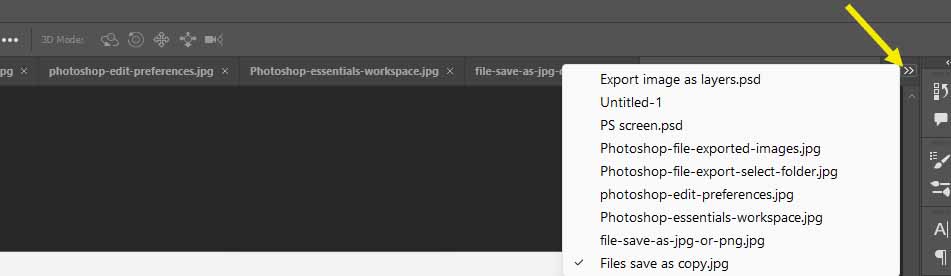
- Open Project Tab – the current open file will show on the project tab as bold white. All the other open files will be displayed as well. If you have opened more files than the area of the screen will hold, they may be viewed in a list by clicking the double right arrow at the top right corner of the screen.
- Active Tool (Options) Bar – this bar goes away and changes constantly. For example, the transform bar allows you to type in a size for a drawn box. When I need it, it’s gone. To bring the tool options back select the object again or select the tool from the main toolbar on the left.
- Document, Canvas, or Artboard – the main part of the screen. This work area is called different things, depending on which type of file you choose to open.
- Open Panels – the panels on the right may be docked, un-docked, moved, turned off, or collapsed. The most essential panels to be familiar with are the Layers, Characters, and Properties.
- Collapsed Panels – these panels hold exactly the same thing as the open panels. Click on the icon and the panel will expand to show the full list of options.
Use the Window menu to add, remove, open or close panel options. Any open panel option can be moved to the collapsed section by click and drag. Click on the title tab of the panel then drag it to the collapsed bar, or to nest in a group other panels. Panels may be undocked and moved anywhere on the screen.
Which Photoshop tools do I need to know about?
Note that not all the tools are explained here. I am only going over the tools you need to know how to use to do everyday simple things. The rest of the tools could be used in basic tasks, but it is not as likely.
- Move or Selection Tool – The shortcut is the “v” key. This tool is used to grab an object or select a layer.
- Marquee – Use one of the shapes to draw around an area to select it. Click the tool, click the first corner, hold the left mouse key, and drag to draw the shape around the area.
- Lasso – Allows you to draw a custom shape around an area. Hold down the mouse key to start dragging the selection, then release the mouse key. Don’t click again or a new selection will start. This tool takes practice to get it right.
- Object Selection – Use this tool to single out a small piece of a big picture. Draw a box around the area or hover the mouse over the piece and click to automatically select it. Then wait while Photoshop defines it. To select more than one piece hold the shift key and select again.
- Eyedropper – This is used to take a sample of a color. The color is then applied to the Swatches panel and becomes the foreground or the top box color in the Colors tool.
- Brush-Pencil – Use these to draw or paint colors or lines.
- Stamp – Use the Alt key to select and area then stamp that color or pattern over another area.
- Eraser – The eraser tool will change the color one pixel at a time, to match the background of an image. The background eraser will select a single color. The magic eraser tool will remove all the pixels of the same color from an area.
- Paint – Fills any area with the color shown in the top box of the color picker.
- Smudge-Use this tool to smudge one section of color into another.
- Blur-Use this to blur the edges of one color or section.
- Sharpen-Use it to enhance the edges of an image.
- Type- Used to add Text to an image. There are options of horizontal, vertical, or mask. To type a word, click on the image and type. To enter a paragraph, click a spot then drag a box.
- Shapes – Selecting Rectangle, Ellipse, Triangle, Polygon, or Line will allow you to click the canvas and draw the shape. That shape can be used as part of an image or as a mask.
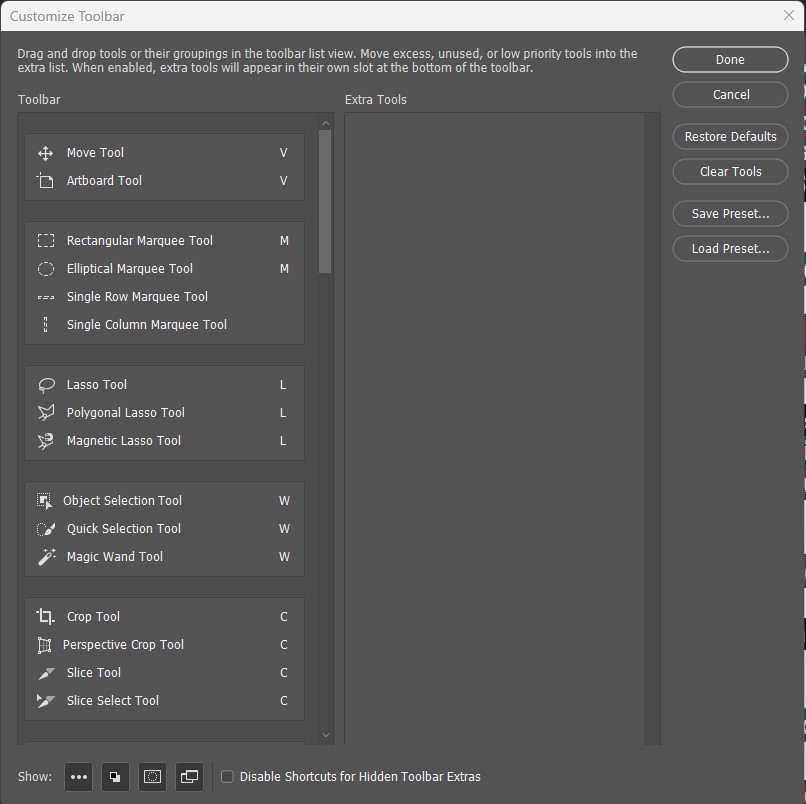
- Custom Shape- This opens a selection box in the Options bar to add a specific shape to the canvas.
- Three dots– This will open a window to customize the toolbar. Any tool moved from the left side to the right will be shown under the three dots.
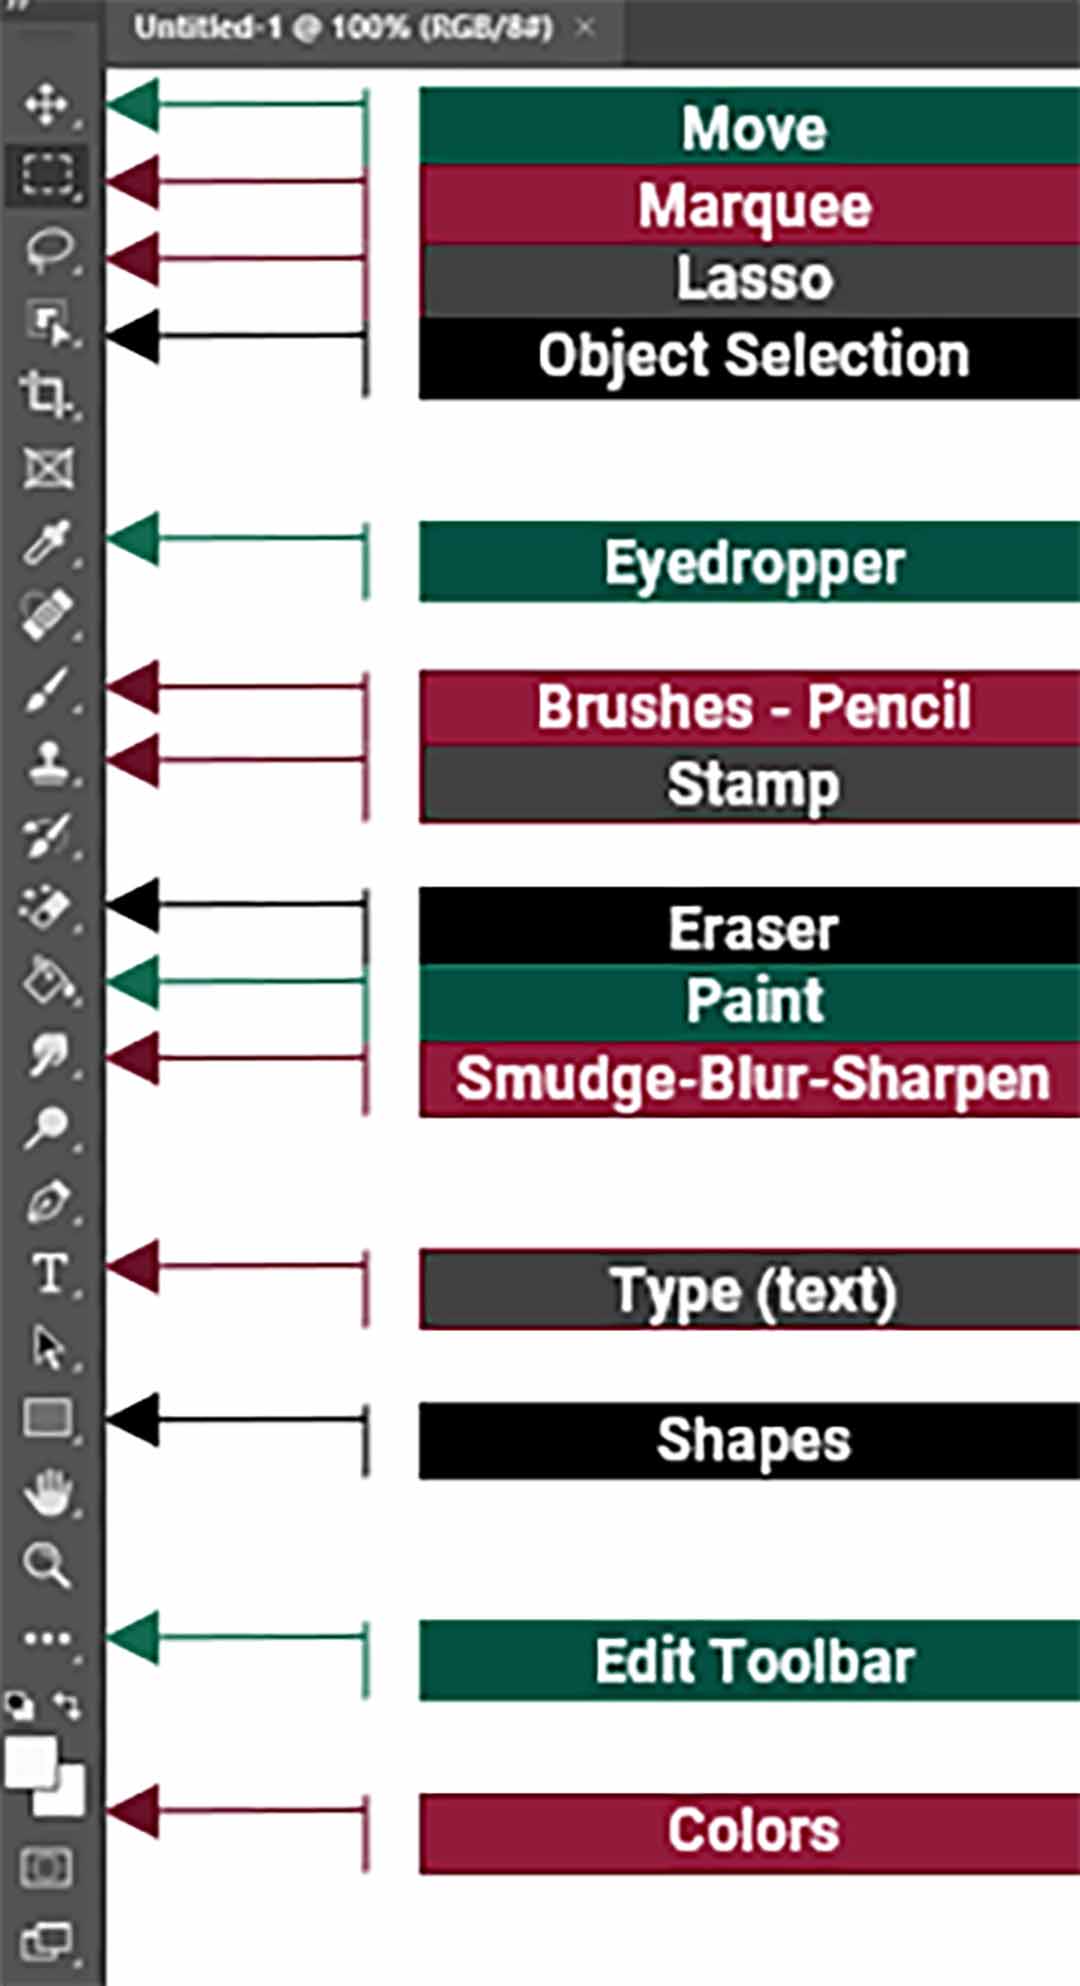
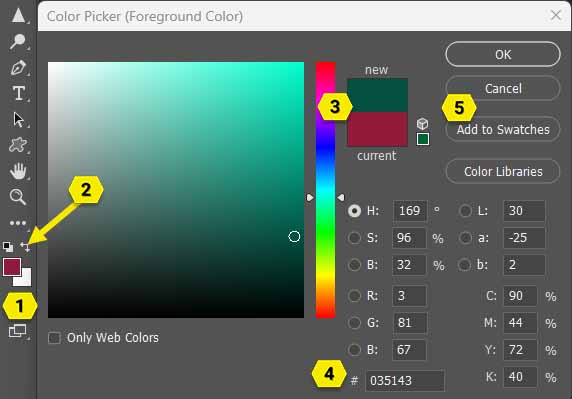
- Colors – The two-color boxes will show the foreground and the background color that are selected. Double click on the boxes to open the Color Picker.
- 1= is the foreground background boxes on the tool bar.
- 2= this arrow is used to switch the color boxes around.
The Color Picker can be opened from several locations.
- 3= shows the new color chosen and the current color selected. clicking OK would move the green color to the foreground color.
- 4= is the HEX number or other codes, may be entered to select a specific color.
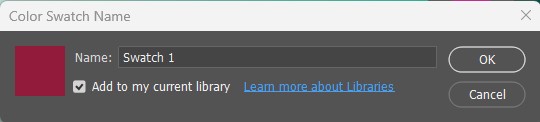
- 5= clicking the Add to Swatches button will open the Color Swatch Name box. The color can be named and then added to the current library to use this color in other projects.
What are the panels in Photoshop used for?
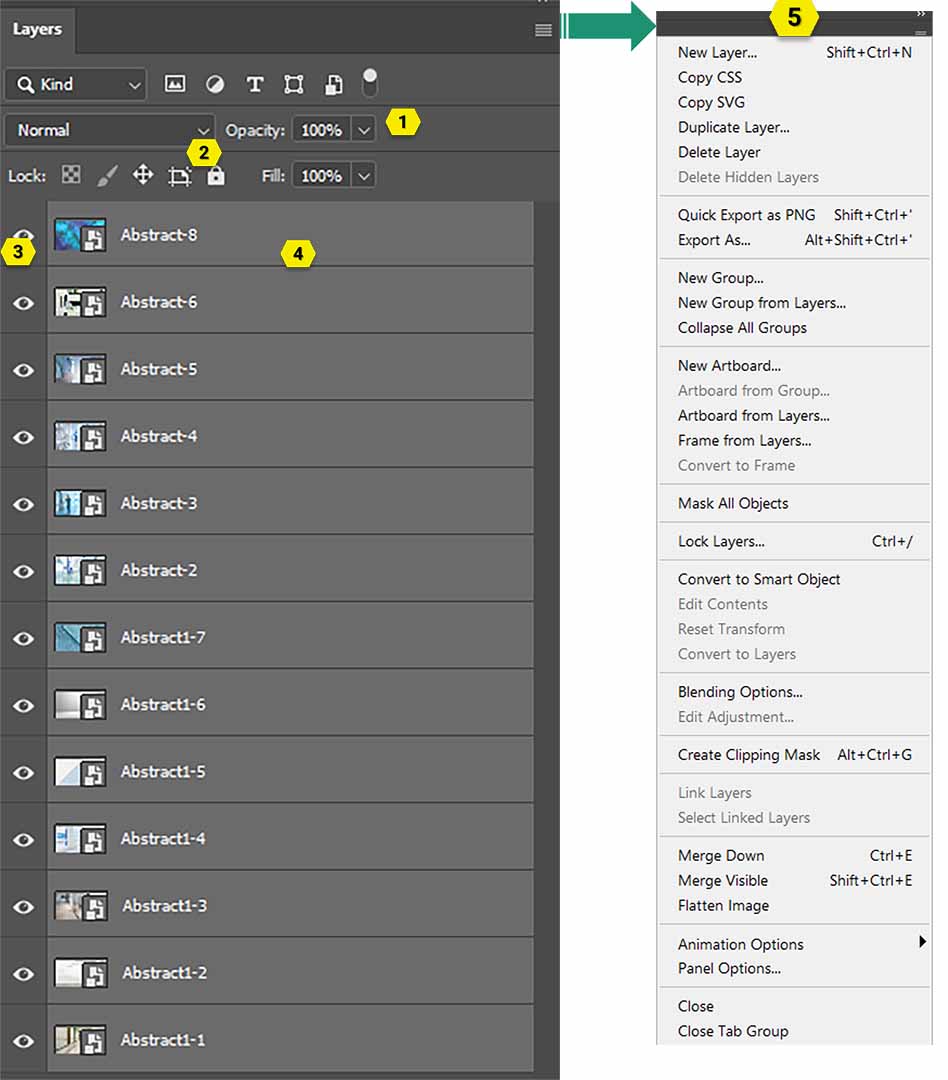
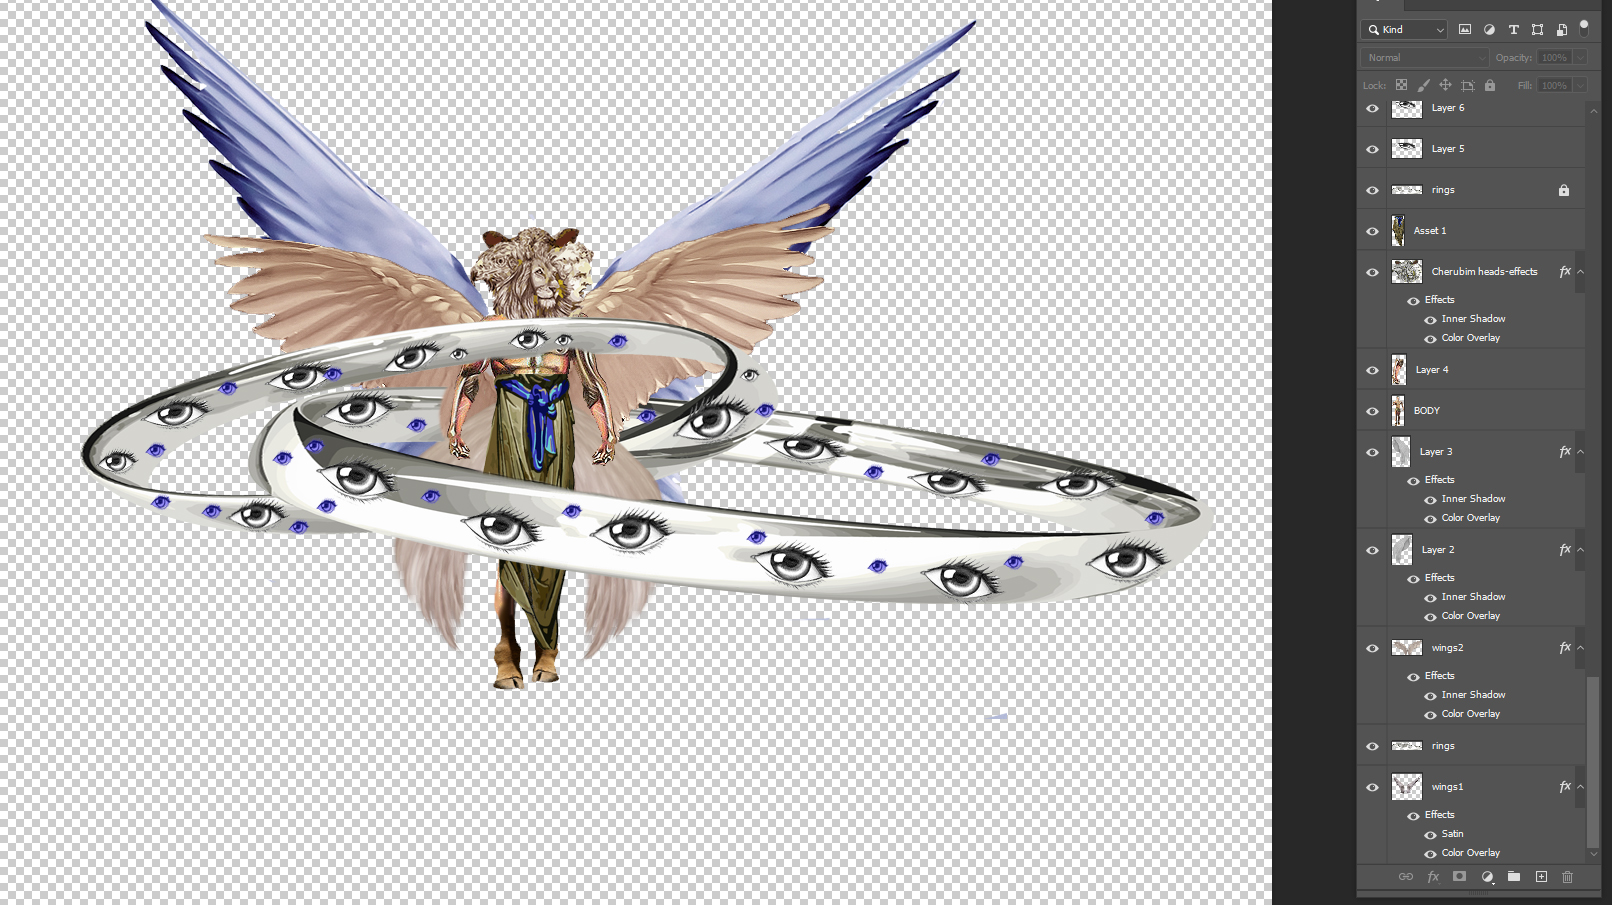
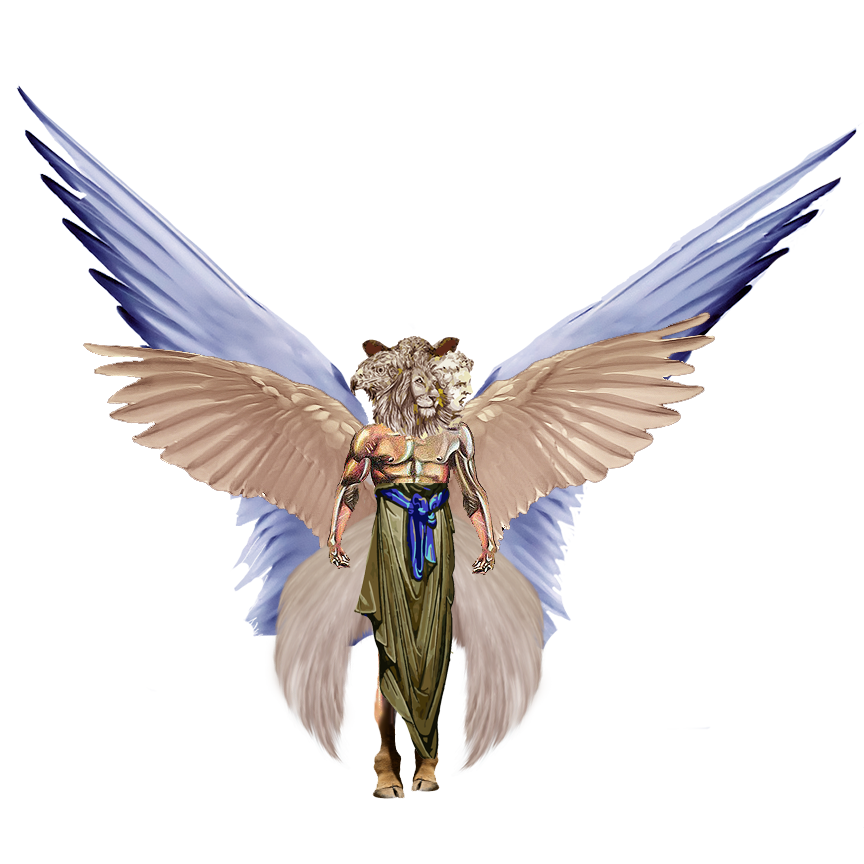
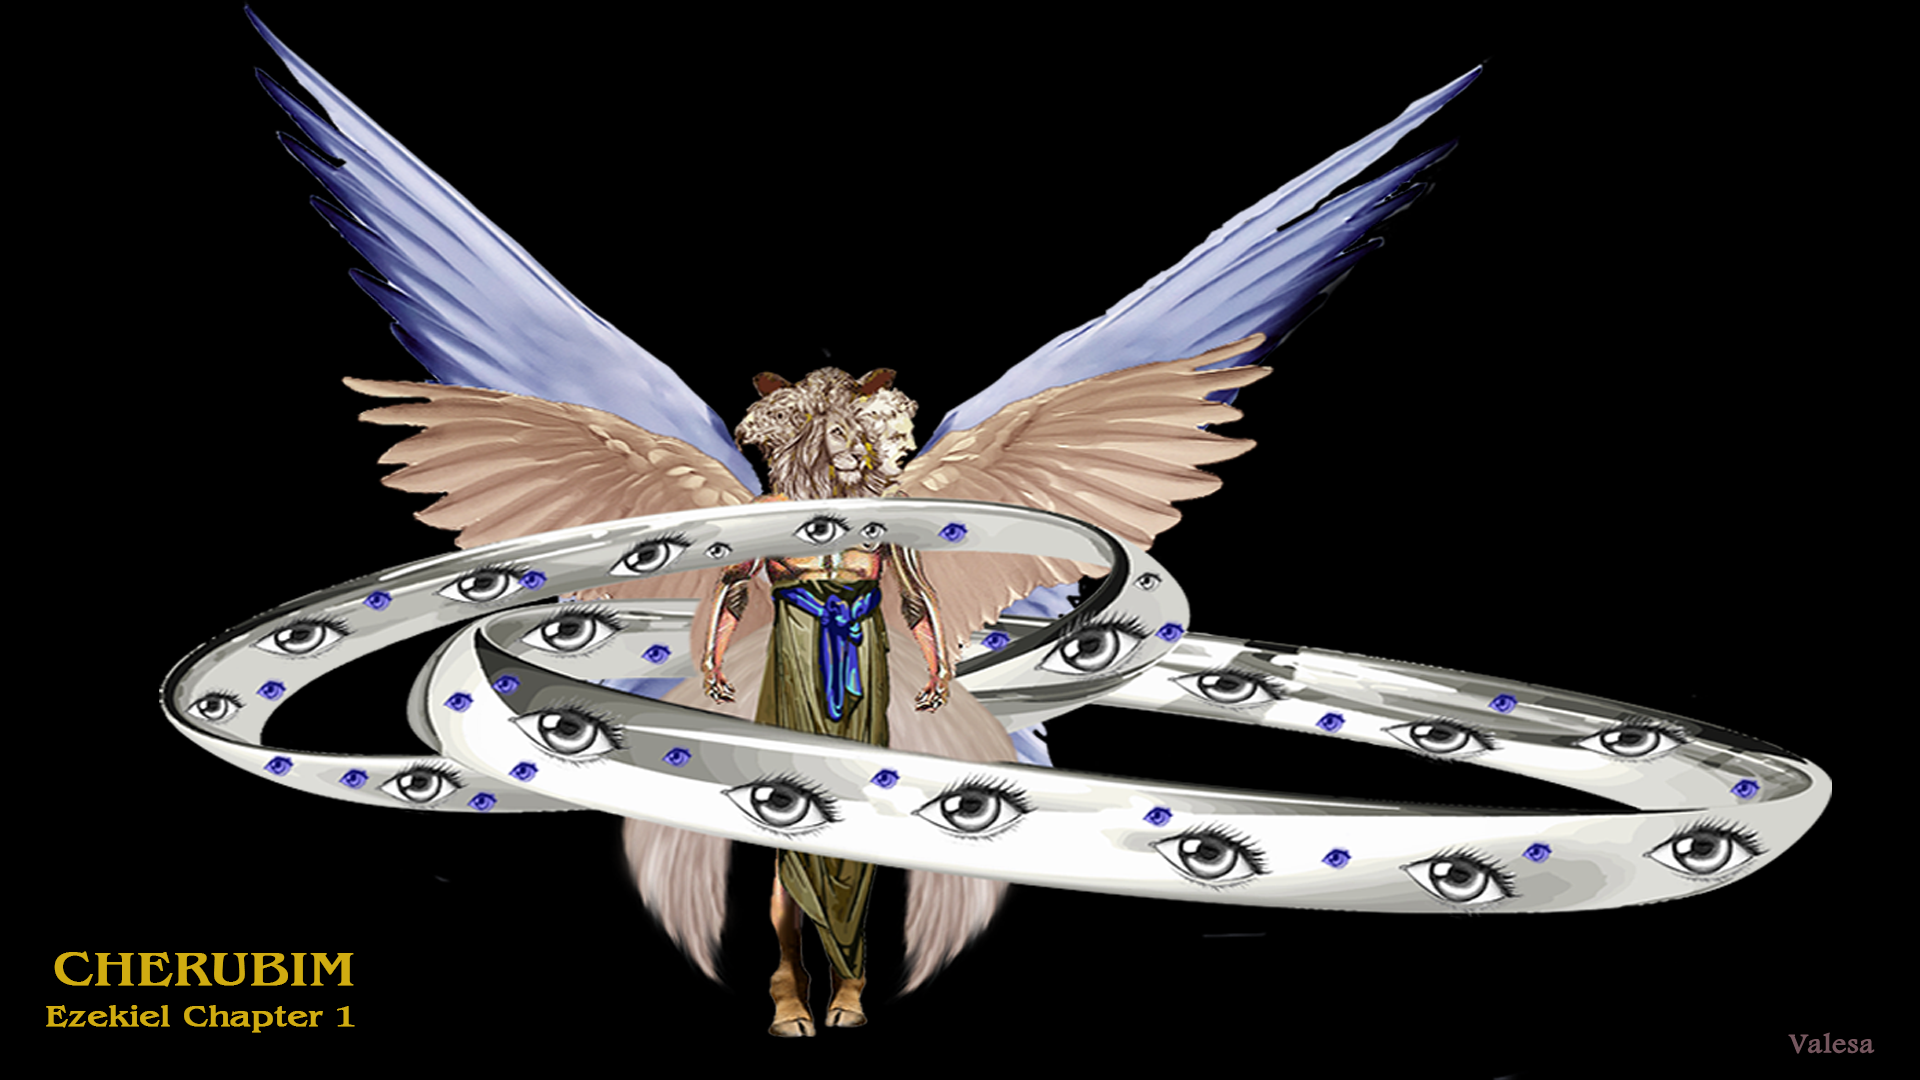
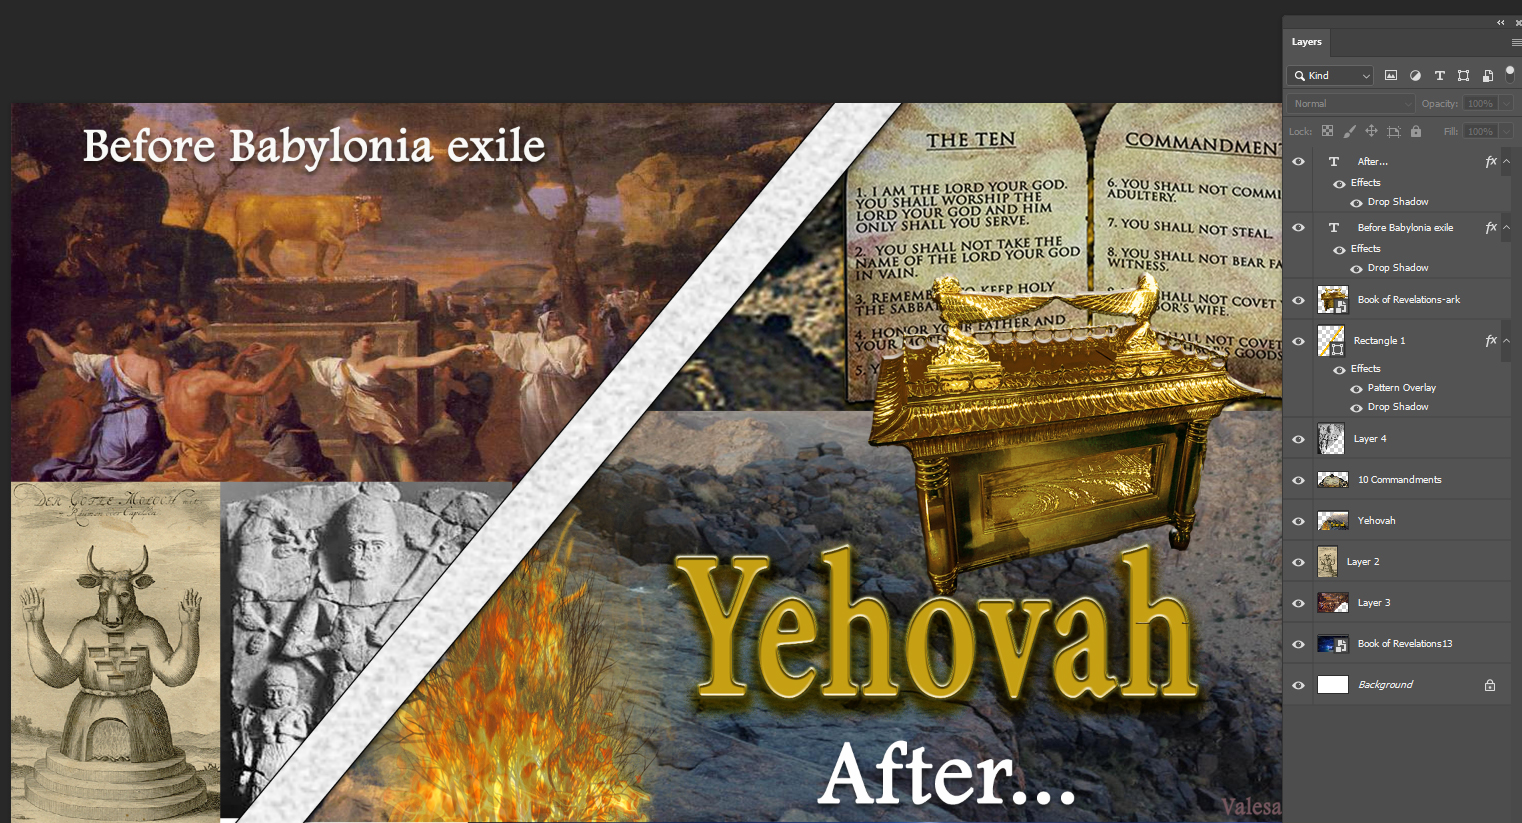
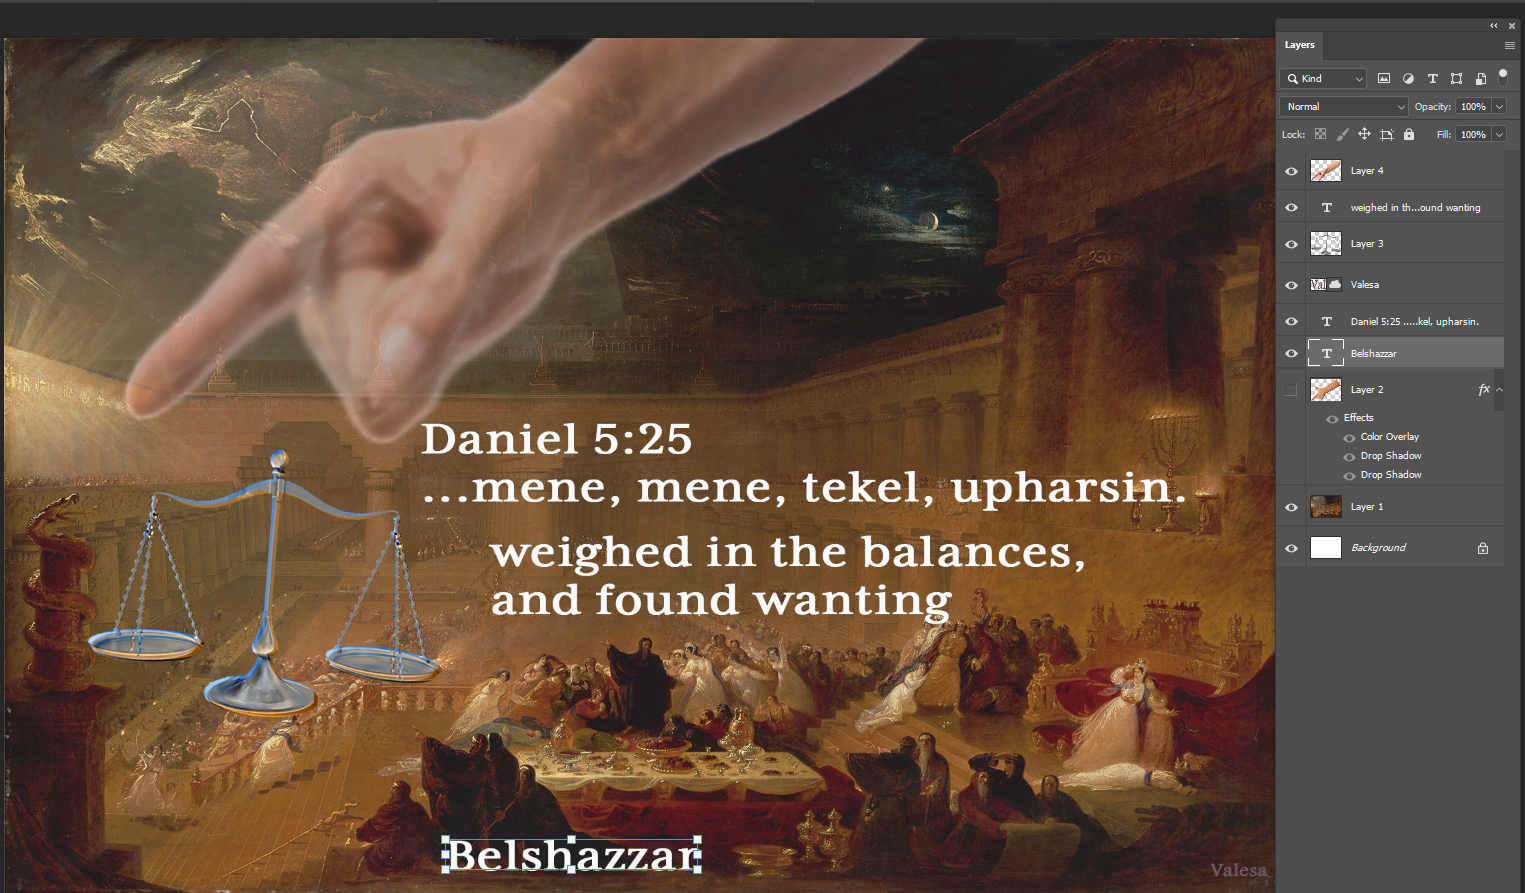
The Layers panel is used when creating detailed artwork like the examples below.
- 1= Opacity is used to fade out a layer so the layer underneath may be seen. This is used in different ways in the Cherubim with eyes and rings.
- 2= Lock is used to keep a layer from moving or being accidentally changed while you are working on other things around it.
- 3= Eye/Hide is used to remove a layer from view. This is helpful if you are working on layers below it or if you want to take something away (for now) without deleting it.
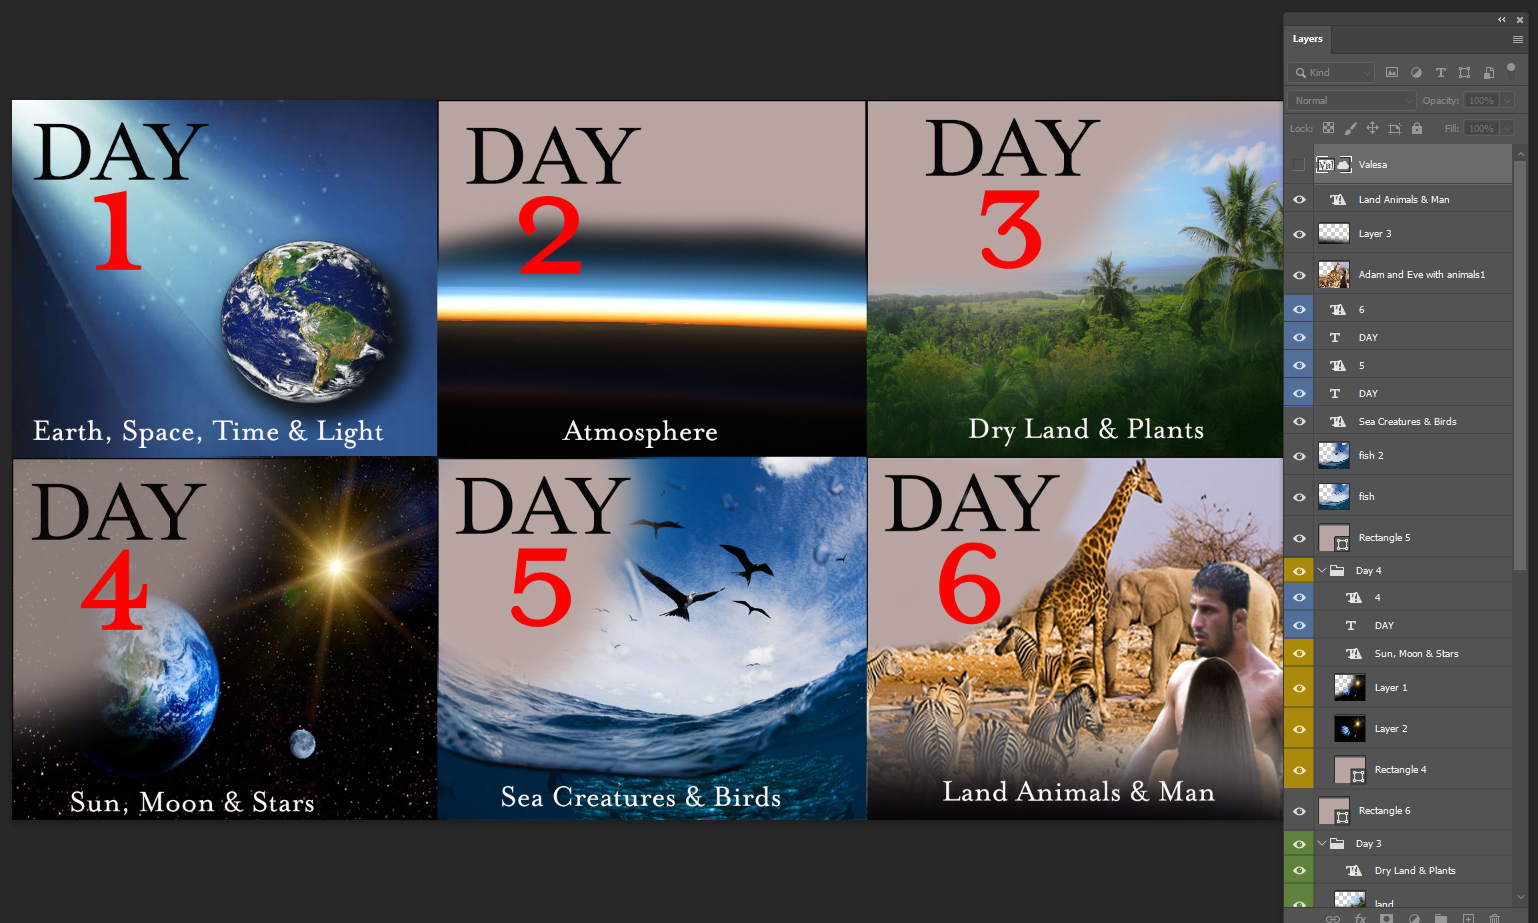
- 4= Layers are the individual levels of graphics that are piled on top of each other to create the final artwork.
- 5=More Menu is accessed by clicking the hamburger icon at the top right of the layers panel.
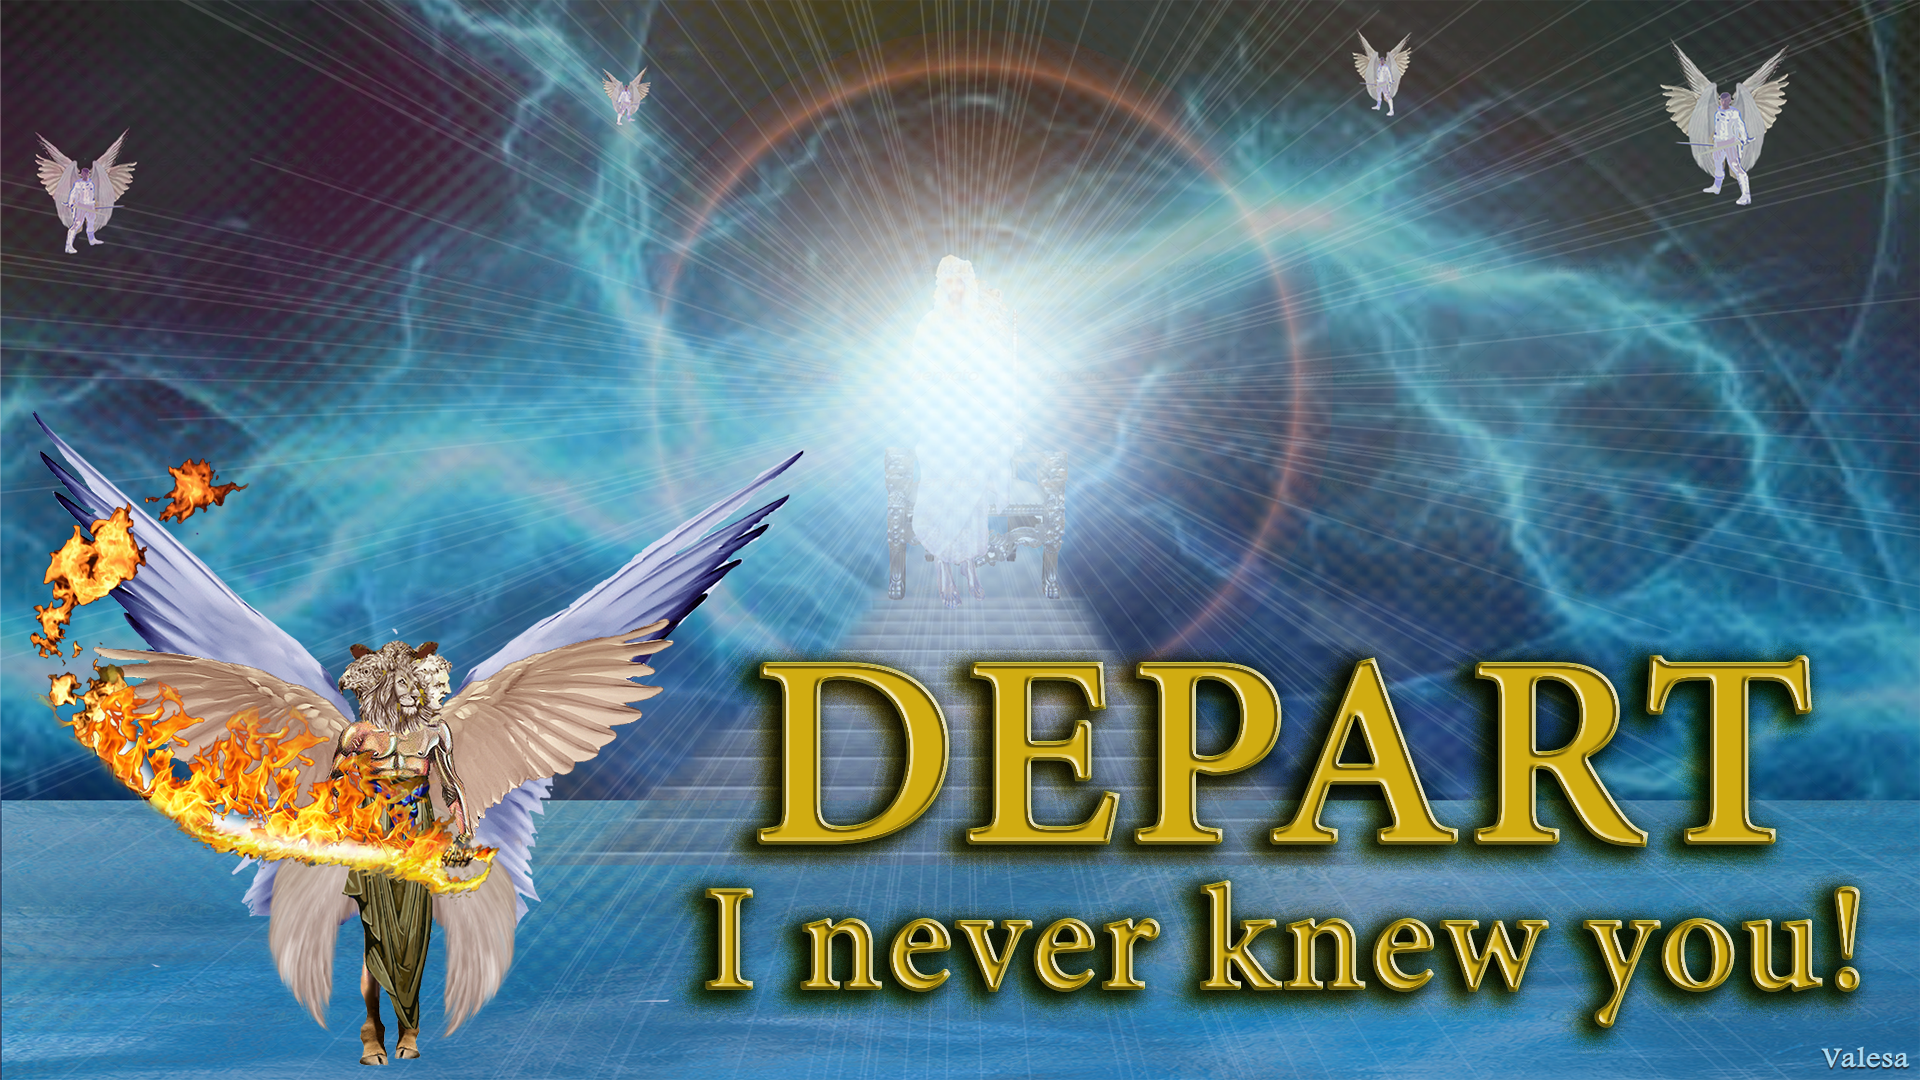
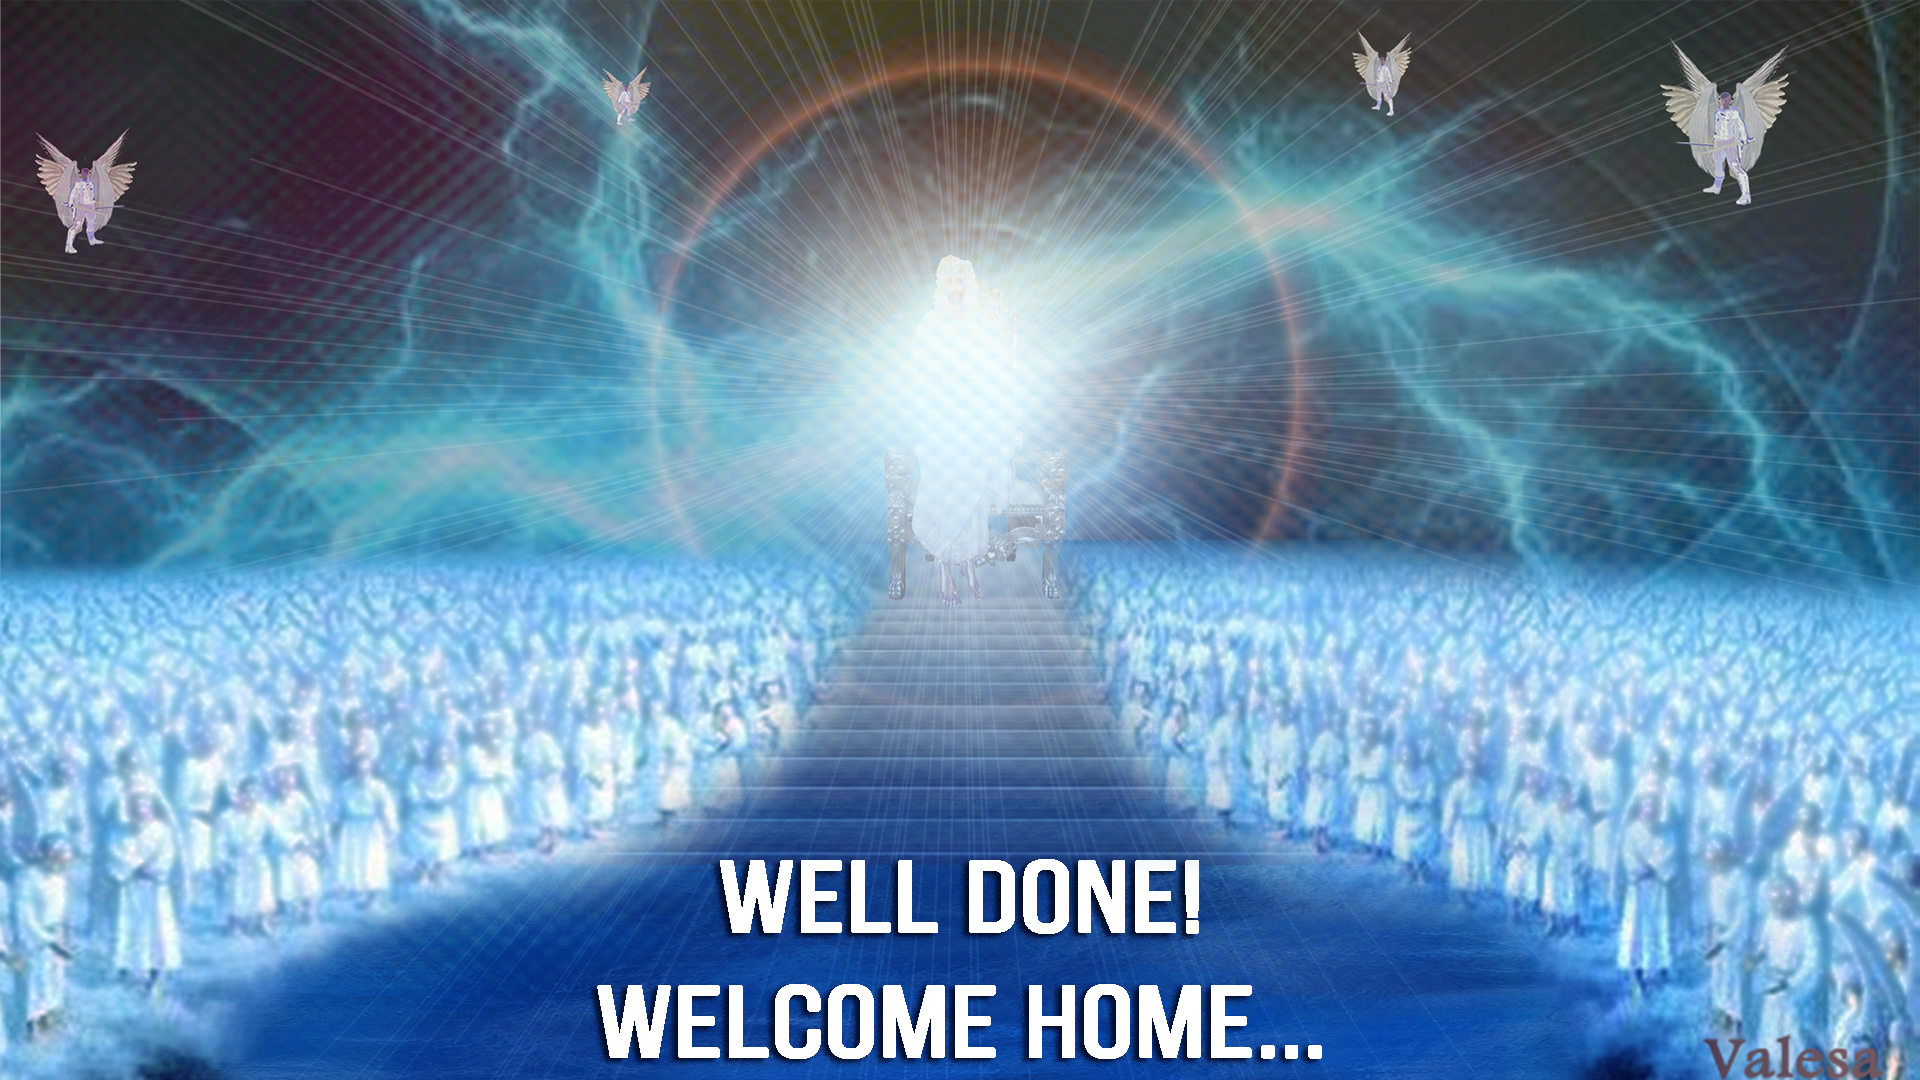
Each one of the detailed graphics below were created by adding many different layers and layer effects. I have included an image of the layers in a few. Notice how the Cherubim base image was changed and added to, creating a new graphic.
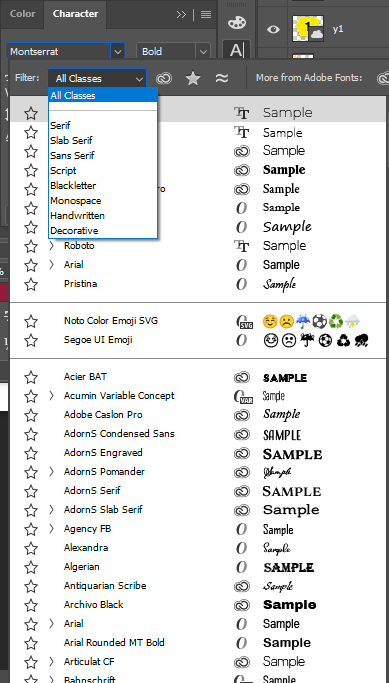
- 1 = Font name selector. The drop-down will open a list of all fonts installed on the computer. The Classes filter may be used to drill down the list to show only the type of font you are searching for.
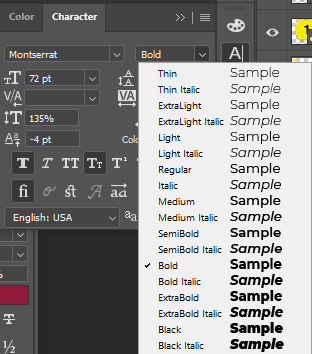
- 2 = Font Size. The drop-down will show a list of common sizes to click to select. The size may be typed in or use the mouse wheel to scroll through sizes.
- 3= Font Style. Selecting the drop-down will list the possible options for the selected font. Some fonts have many different style options, but some may have only Regular and Bold.
- 4= Leading. This means the space between first and second row of font. As shown in the example Character 72pt Font beside the number four has a 5.97 leading. It is unreadable. Look at the one on the far right. The leading is set at the same size as the font.
- 5= Other Styles. The buttons at the bottom of the of the panel will add caps, italic, sub or super script and so forth. Notice the text on the top of the panel on the right has Small Caps and Faux Bold with 138% Horizontal scale. While the one at the bottom center has 120% Horizontal scale and not Small Caps setting.


2 Responses
Thank you for sharing this insightful post. You nailed it explaining your ideas. Looking forward to reading more from you.
Hi my loved one I wish to say that this post is amazing nice written and include approximately all vital infos Id like to peer more posts like this.